

Axure Tutorial: Make Funnel Chart with Repeater
Introduction
Funnel chart is a chart often used when viewing e-commerce shopping data. Through the repeater to make the funnel chart, you can quickly generate the chart without connecting to the external network.
Features to be Realized

1. Automatically generate chart data after filling in data.
2. The size, color, style and interaction can be changed freely.
3. When the mouse moves in, specific data will be shown.
Preview the completed prototype for this tutorial
Widgets Setup

1. Prepare multiple trapezoids with the same height and different width and fill them with different colors. The trapezoid is named 1, 2, 3... And the largest trapezoid is placed on the top. After making, create all widgets as repeaters and center them horizontally. As shown in the figure above.

The form of repeater is as follows:
Number: arranged as 1, 2, 3, 4 and 5.
Quantity: the number in the first row is the largest and arranged in order.
Name: name of trapezoidal part.

2. As shown in the above figure, make other controls, in which the labels named NameX represents the name of the part of funnel. QuantityX represents the number of parts. There is also a Total text field for storing the total quantity. The notice control includes 2 labels.
Interactions Setup
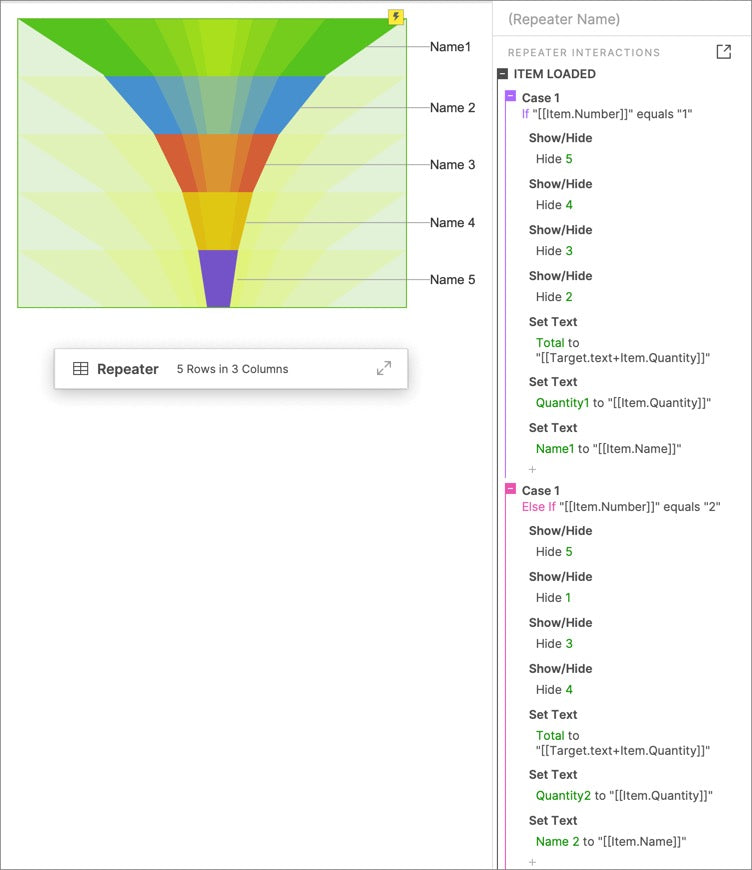
When repeater item is loaded, hide the widgets of other parts. Set the value of the Total text field to Target.text+Item.Quantity to save the Total in the text field. Set the QuantityX text to item Quantity。 Set the NameX text to Item.Name.
Set the text of each part of funnel to quantity and percentage


When the total text changes, set each part of the funnel text to two rows of rich text:
[[LVAR1]]
([[(LVAR1/This.text).toPrecision(4)*100]]%)

When the mouse moves in the part of funnel, the notice panel is shown, its state is set to the corresponding state, and the text is set to the corresponding text. Notice follows the mouse move.
In this way, all the settings are completed. If you have any questions and suggestions, please leave a message.
If you like the article, please share it with others with page link, thanks for your supporting! ❤
Note: Click here to download the completed RP file for this tutorial (RP 10 or up).
Well Joe @AxureBoutique, a technical writer and teacher, focuses on Axure prototype design and product design.


Leave a comment