Axure Tutorial: Simulate the Effect of Axure File Upload Progress Bar
Introduction
As we all know, Axure can simulate the file upload effect by setting the text field type to file, but the button style is not good-looking.
Now I will share how to realize the Axure file upload effect without the text field file type, that is, the incremental effect of the progress bar, so as to make the button style and interaction process more vivid and interesting.
Features to be Realized
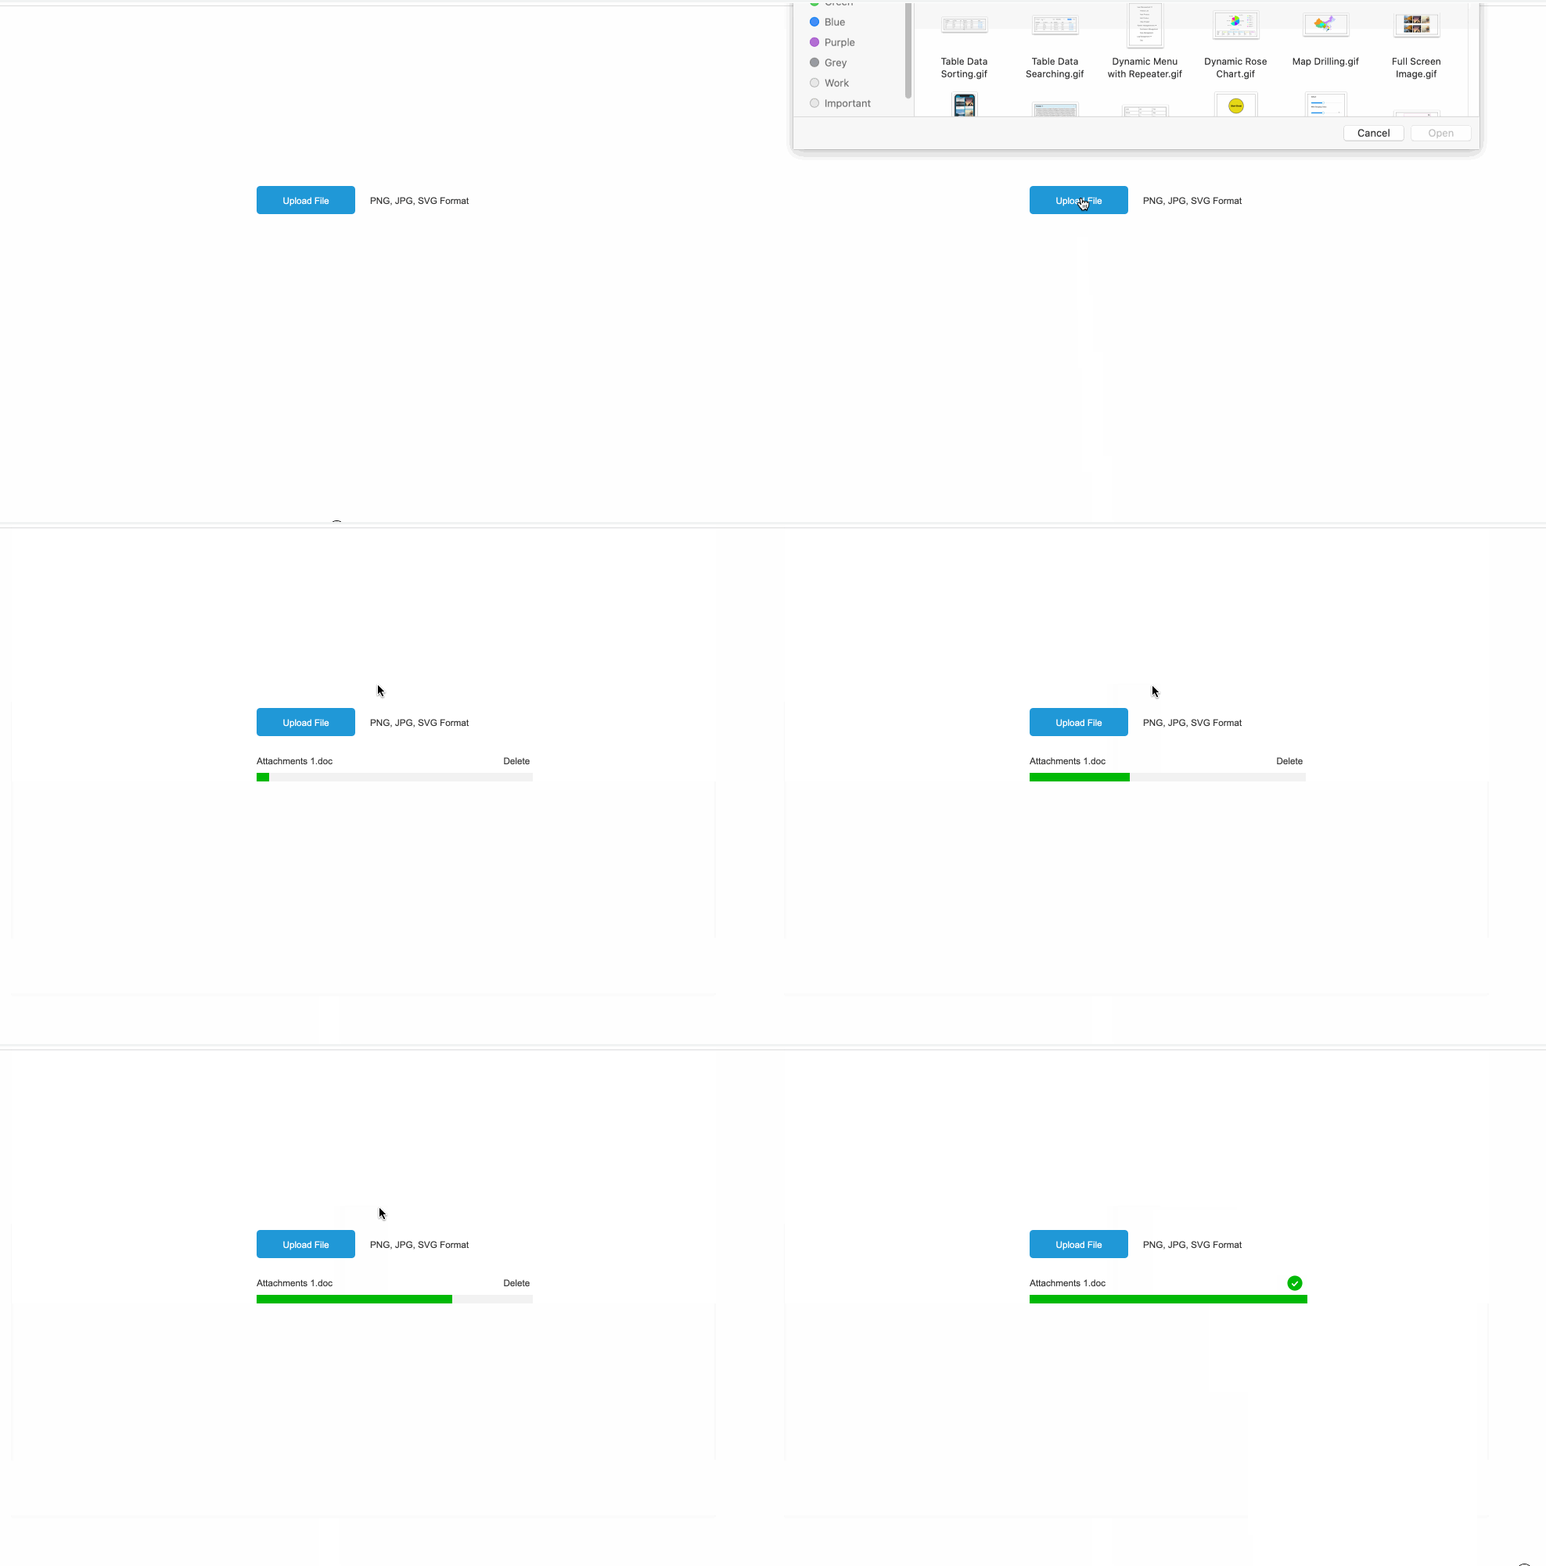
1. When clicking the upload button, call the browser's file selection interface.
2. When selecting the file, the pre made upload progress bar will be shown and the animation will be shown.
How to Realize these Features
By calling JavaScript code. When file is selected, a progress bar is shown. The progress bar automatically increases the progress by using cycling events (Rotated).

Preview the completed prototype for this tutorial
Widgets Setup

1. Drag a button and a label into canvas, and name the button as Button and Hint Text respectively.

2. Then drag two rectangles (filled with green, named progress and gray, named Bg bar), two text labels (attachment and delete) and success icon into canvas. Finally, select them, right-click to turn them into a dynamic panel, and name it success to simulate the effect of uploading a progress bar.
Interactions Setup

1. Select the button, add the Click/Tap interaction, add the Open Link action, click Link to external URL, and click fx on the right to add the code:
javascript:openFile(txt=>{ $axure("@Success").show(); });
Success is the name of the dynamic panel, which means that the dynamic panel will be shown after uploading.
2. Then add the Loaded interaction to the button] The operation is the same as above, and the code is as follows:
javascript: window.openFile = function (callBack) { var element = document.createElement('input'); element.setAttribute('type', "file"); element.setAttribute('id', "btnOpenFile"); element.onchange = function () { readText(this, callBack); document.body.removeChild(this); }; element.style.display = 'none'; document.body.appendChild(element); element.click(); }; window.readText = function (filePath, callBack) { var reader; if (window.File && window.FileReader && window.FileList && window.Blob) { reader = new FileReader(); } else { console.log('Your browser does not support this feature!'); return false; } var output = ""; if (filePath.files && filePath.files[0]) { reader.onload = function (e) { output = e.target.result; callBack(output); }; reader.readAsText(filePath.files[0]); } else { return false; } return true; }

3. Set the Success dynamic panel to hidden.

4.Next, add the shown interactive event to the dynamic panel [Success],
When it is shown, rotate 0 degrees.

4. Add the condition of 100% completion to the progress bar, hide the delete button and display of success icon. Select [progress], add [rotated] action, set the size, select This widget, and set the width to: [This.width + 4]] (i.e. its own width plus 4).
At the same time, add condition to this interaction: when the width of the progress bar is less than the width of the Bg bar, execute the above interaction.
Next, add cyclic interaction, wait time and trigger events to gradually widen the progress bar, as shown in the above image.
Finally, you only need to add else condition, that is, when the progress bar is 100%, show success icon and hide delete button.
In this way, all the settings are completed. If you have any questions and suggestions, please leave a message.
If you like the article, please share it with others with page link, thanks for your supporting! ❤
Note: Click here to download the completed RP file for this tutorial (RP 10 or up).
Well Joe @AxureBoutique, a technical writer and teacher, focuses on Axure prototype design and product design.


Leave a comment