

Axure Tutorial: Add Interactions to Widget
Introduction
This article is a part of course Axure Full Course: Tutorial, Tips and Templates.
Axure RP's strength and difference from other design software lies in its interactions. By adding interactions to the widget(s), users can better understand the function of the product and the feedback of action. Today we will learn how to add interactions to widget.
Widget and its Event Triggers of Interaction
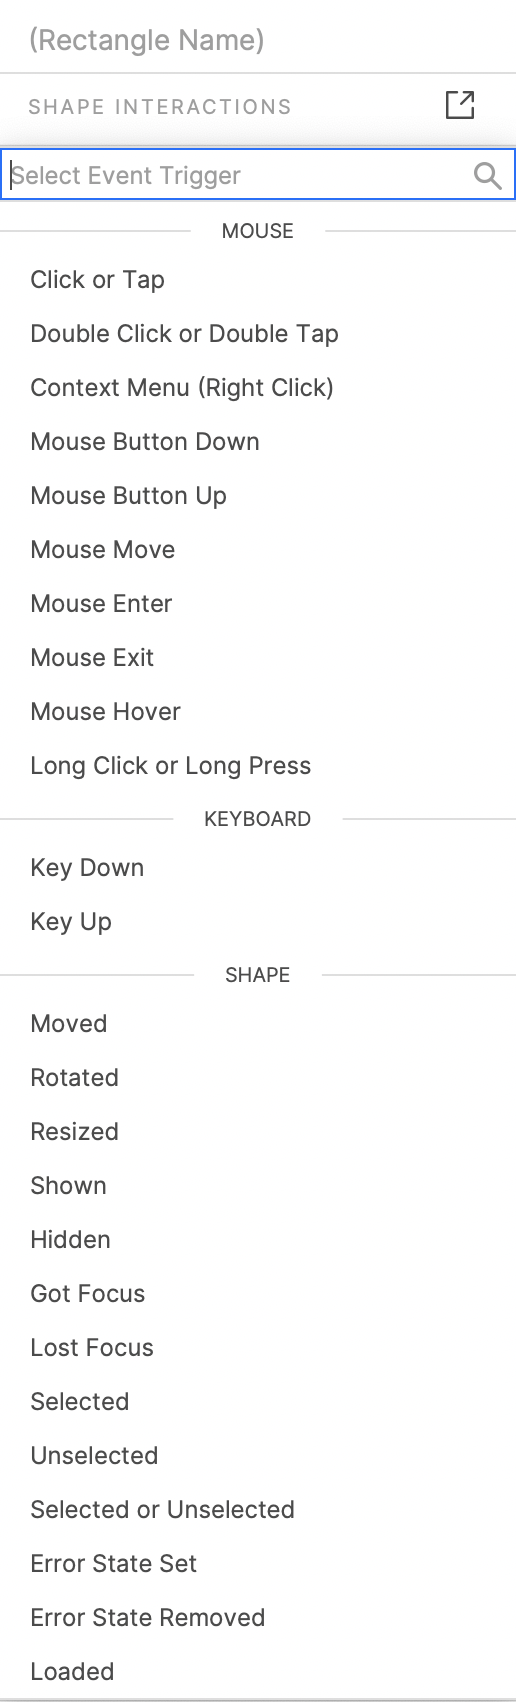 Event Trigger of a rectangle
Event Triggers represent the trigger events of the widget's interaction, such as when click or tap the button, hide the button. Click or Tap is an Event trigger
Different widgets have different event triggers of interaction. For example, a text field has an event tigger of Text Changed, and a dynamic panel has an event trigger of Panel State Changed.
The unique event trigger of each widget will be introduced in detail later when we introduce each widget.
Cases and Conditions
Each event trigger can have multiple cases. If there is only one case, it is not displayed on the interface by default. Click the Condition button on the Interactions pane on the right side of the screen to open the Condition Builder window and edit the case name and conditions (not Required), click OK, you can see case and conditions on the right pane.

When the default case name is modified, the name of the case will appear on the right interface. At this time, move the mouse up, and you can see the button of Add Case on the right side of the Event Trigger. After clicking, you can add a new case and edit its name.
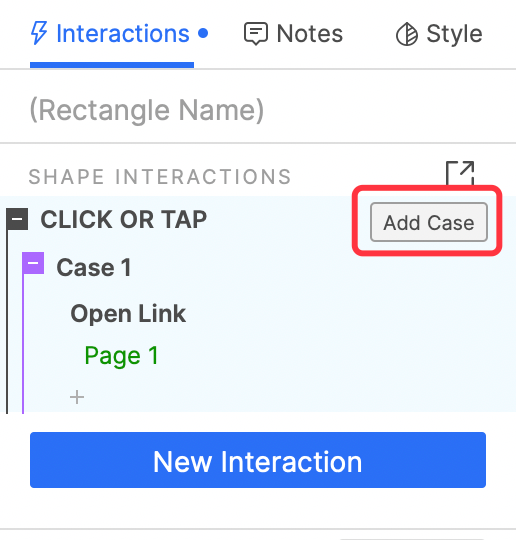
Add Case
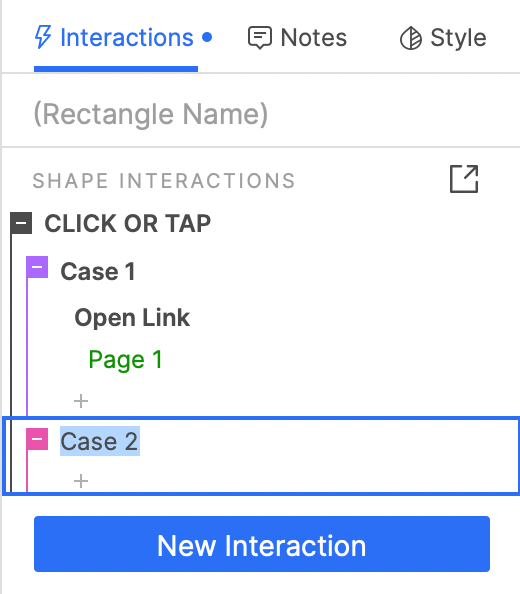 Edit New Case Name
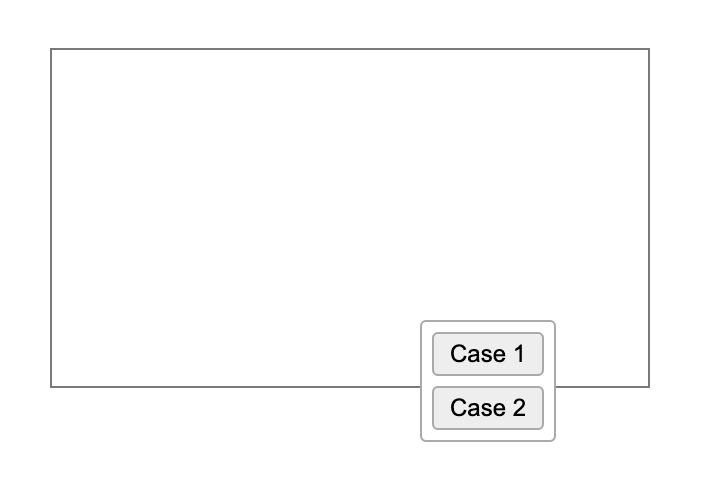
Without adding any conditions, you need to manually select the case to perform the actions
Preview the prototype. When you click to trigger event, you can see the different cases you just set. Click the buttons, and you can see the execution of different actions.
Since you didn't add any conditions, you can only manually select different cases. If you add at least a condition in any cases, the system will automatically judge and execute the actions according to the set condition of the Cases
Add at least one condition, and you can let the system automatically judge and execute the actions according to the conditions.
In the article Axure Tutorial: Instructions on the Use of IF and ELSE IF in Interactions, we initially introduced the use of IF and ELSE IF condition statements, so what is the underlying logic of it?
In Axure, Case's IF and ELSE IF conditional statements are judged and executed according to the following logic:
IF and the subsequent ELSE IF statement (if there is no ELSE IF, IF alone becomes a condition block) form a condition block. First, judge whether the conditions of the first condition block IF are met. If so, perform the actions below IF. If not, judge whether the conditions of the subsequent ELSE IF are met (if there is ELSE IF). If so, perform the actions below ELSE IF, and then terminate the judgment of this condition block. If not, judge the conditions of the next ELSE IF until all ELSE IF are judged.
The condition of the IF of all condition blocks will be judged, regardless of whether there is an ELSE IF statement after the IF of this condition block.
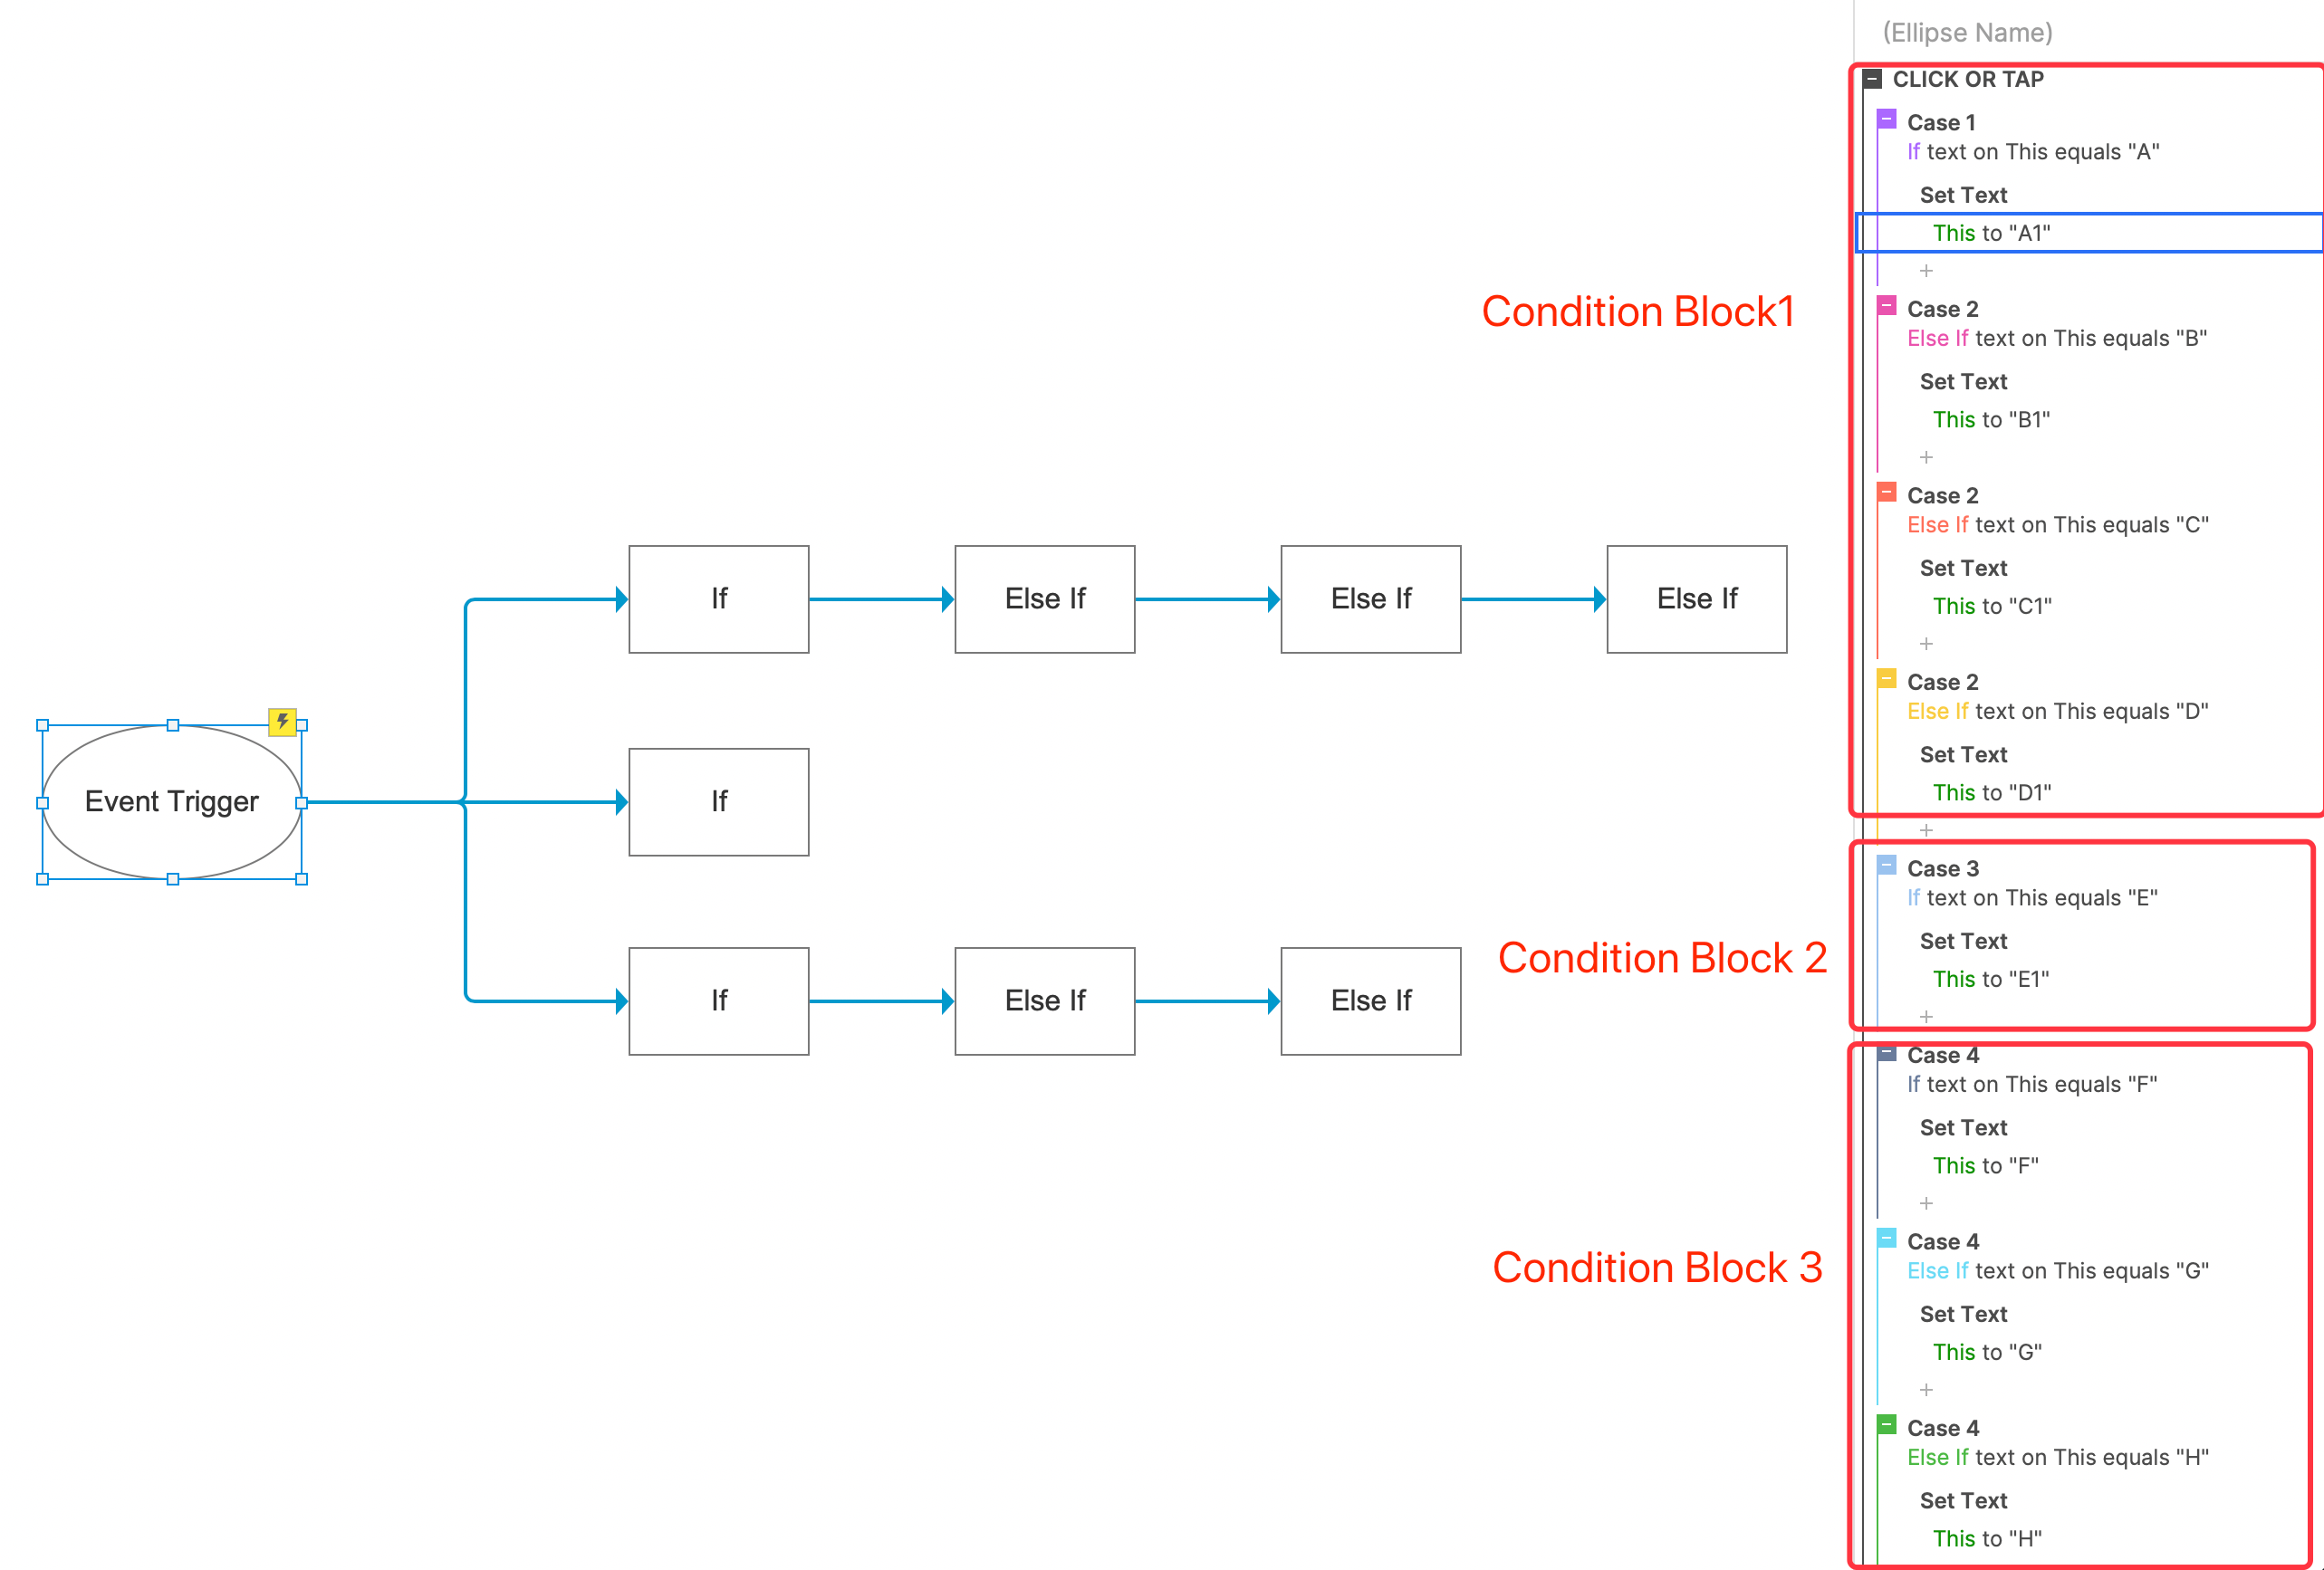
As shown in the above figure, the conditions of the three IF statements will be judged. If they are met, the following actions will be executed. If not, judge the following ELSE IF statement.
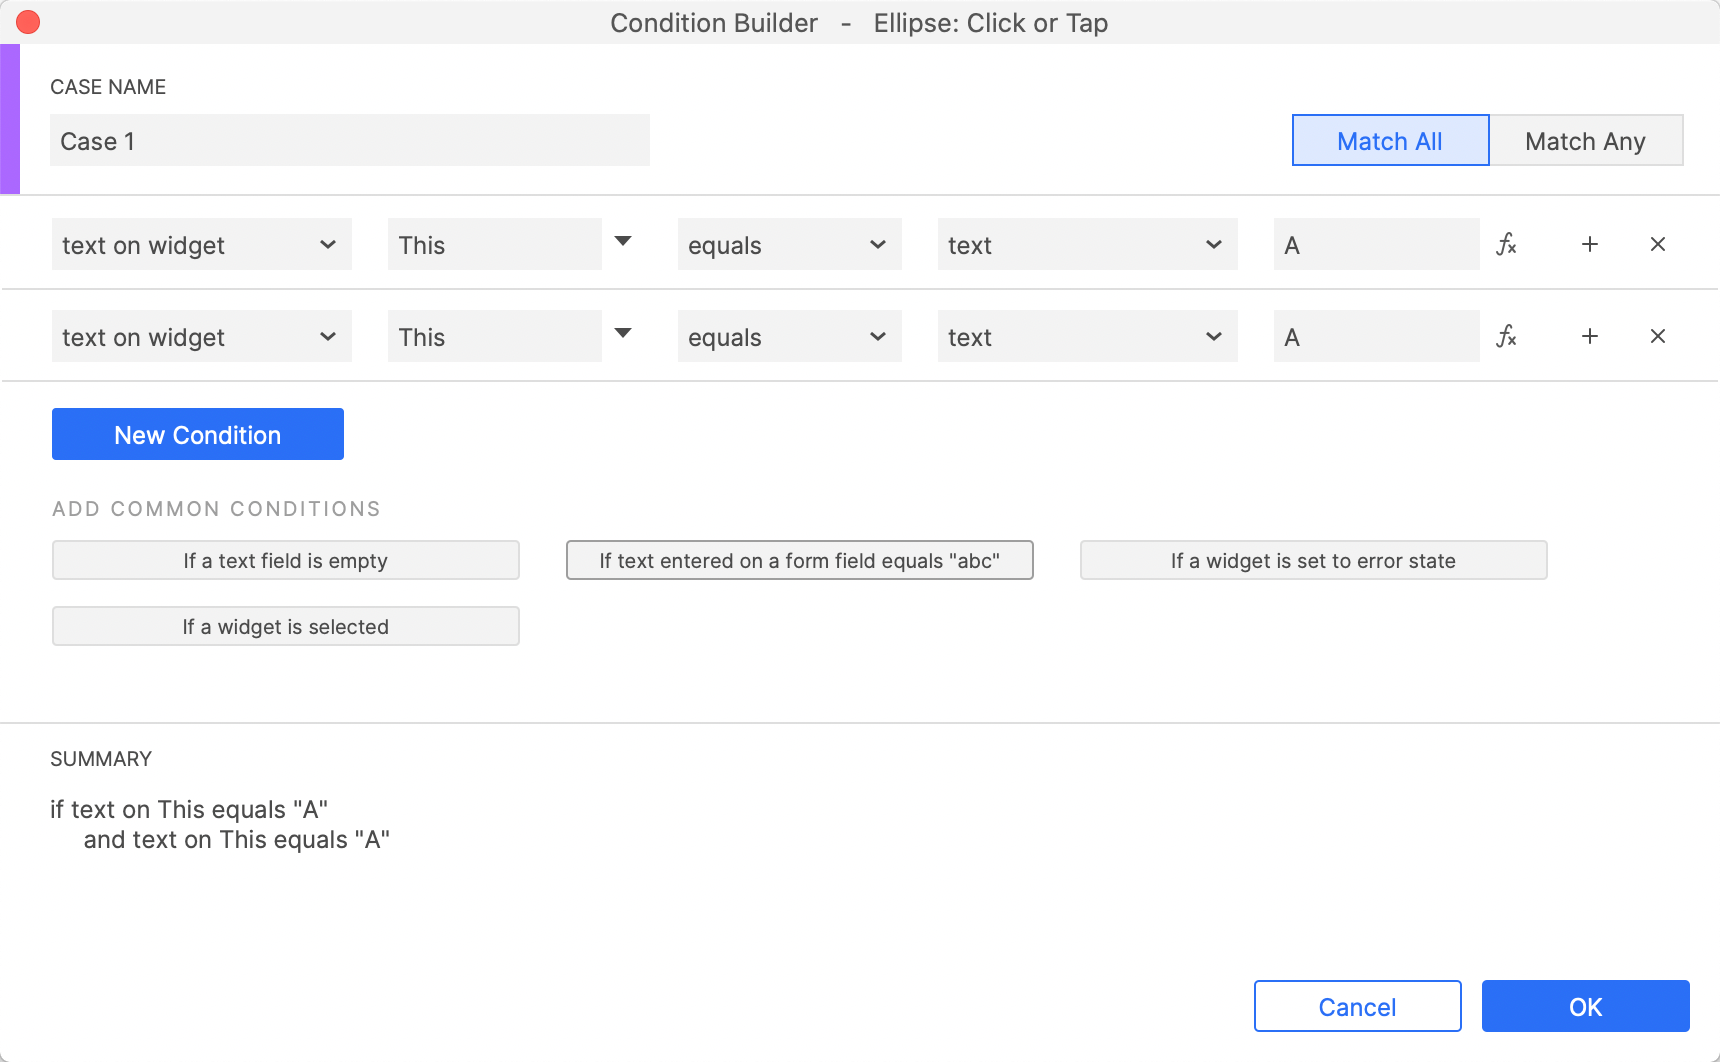
Condition Settings
As shown in the image below, a Case can add multiple Conditions, you can choose Match All or Match Any; click the New Condition or + button, you can add a new condition, click the × button to delete the condition of the row.
Case Actions Settings
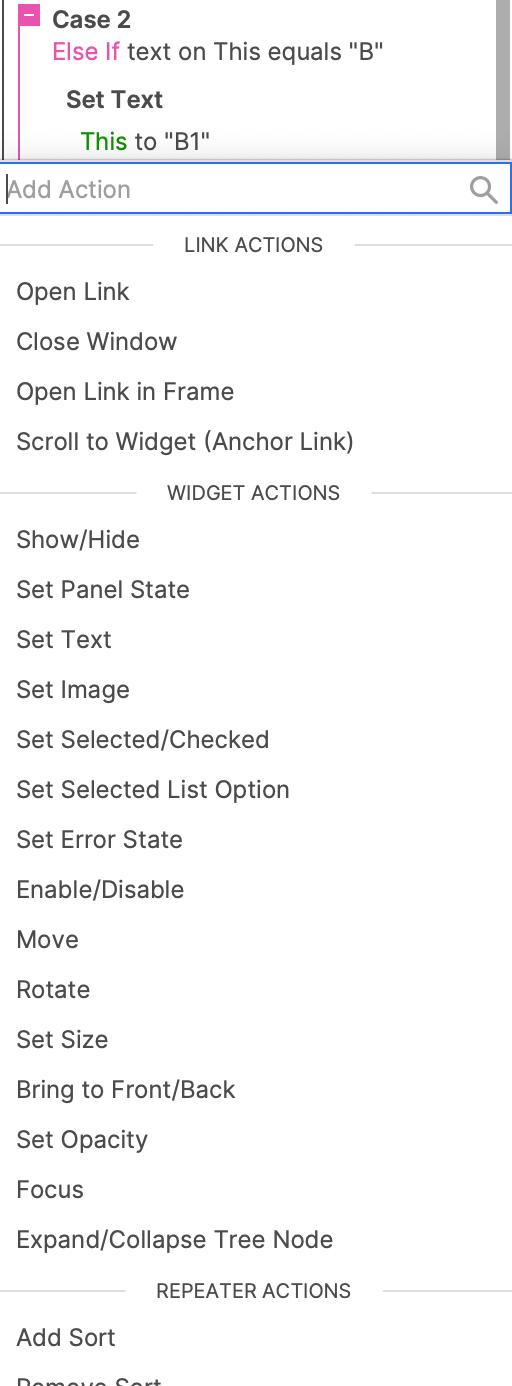
Add Action
Click the + button under the last action of a Case to add an action directly from the drop-down list.
 Add action
Edit action
Click the action on the right panel, you can edit the action directly on the drop-down list.
 Edit action in drop-down list
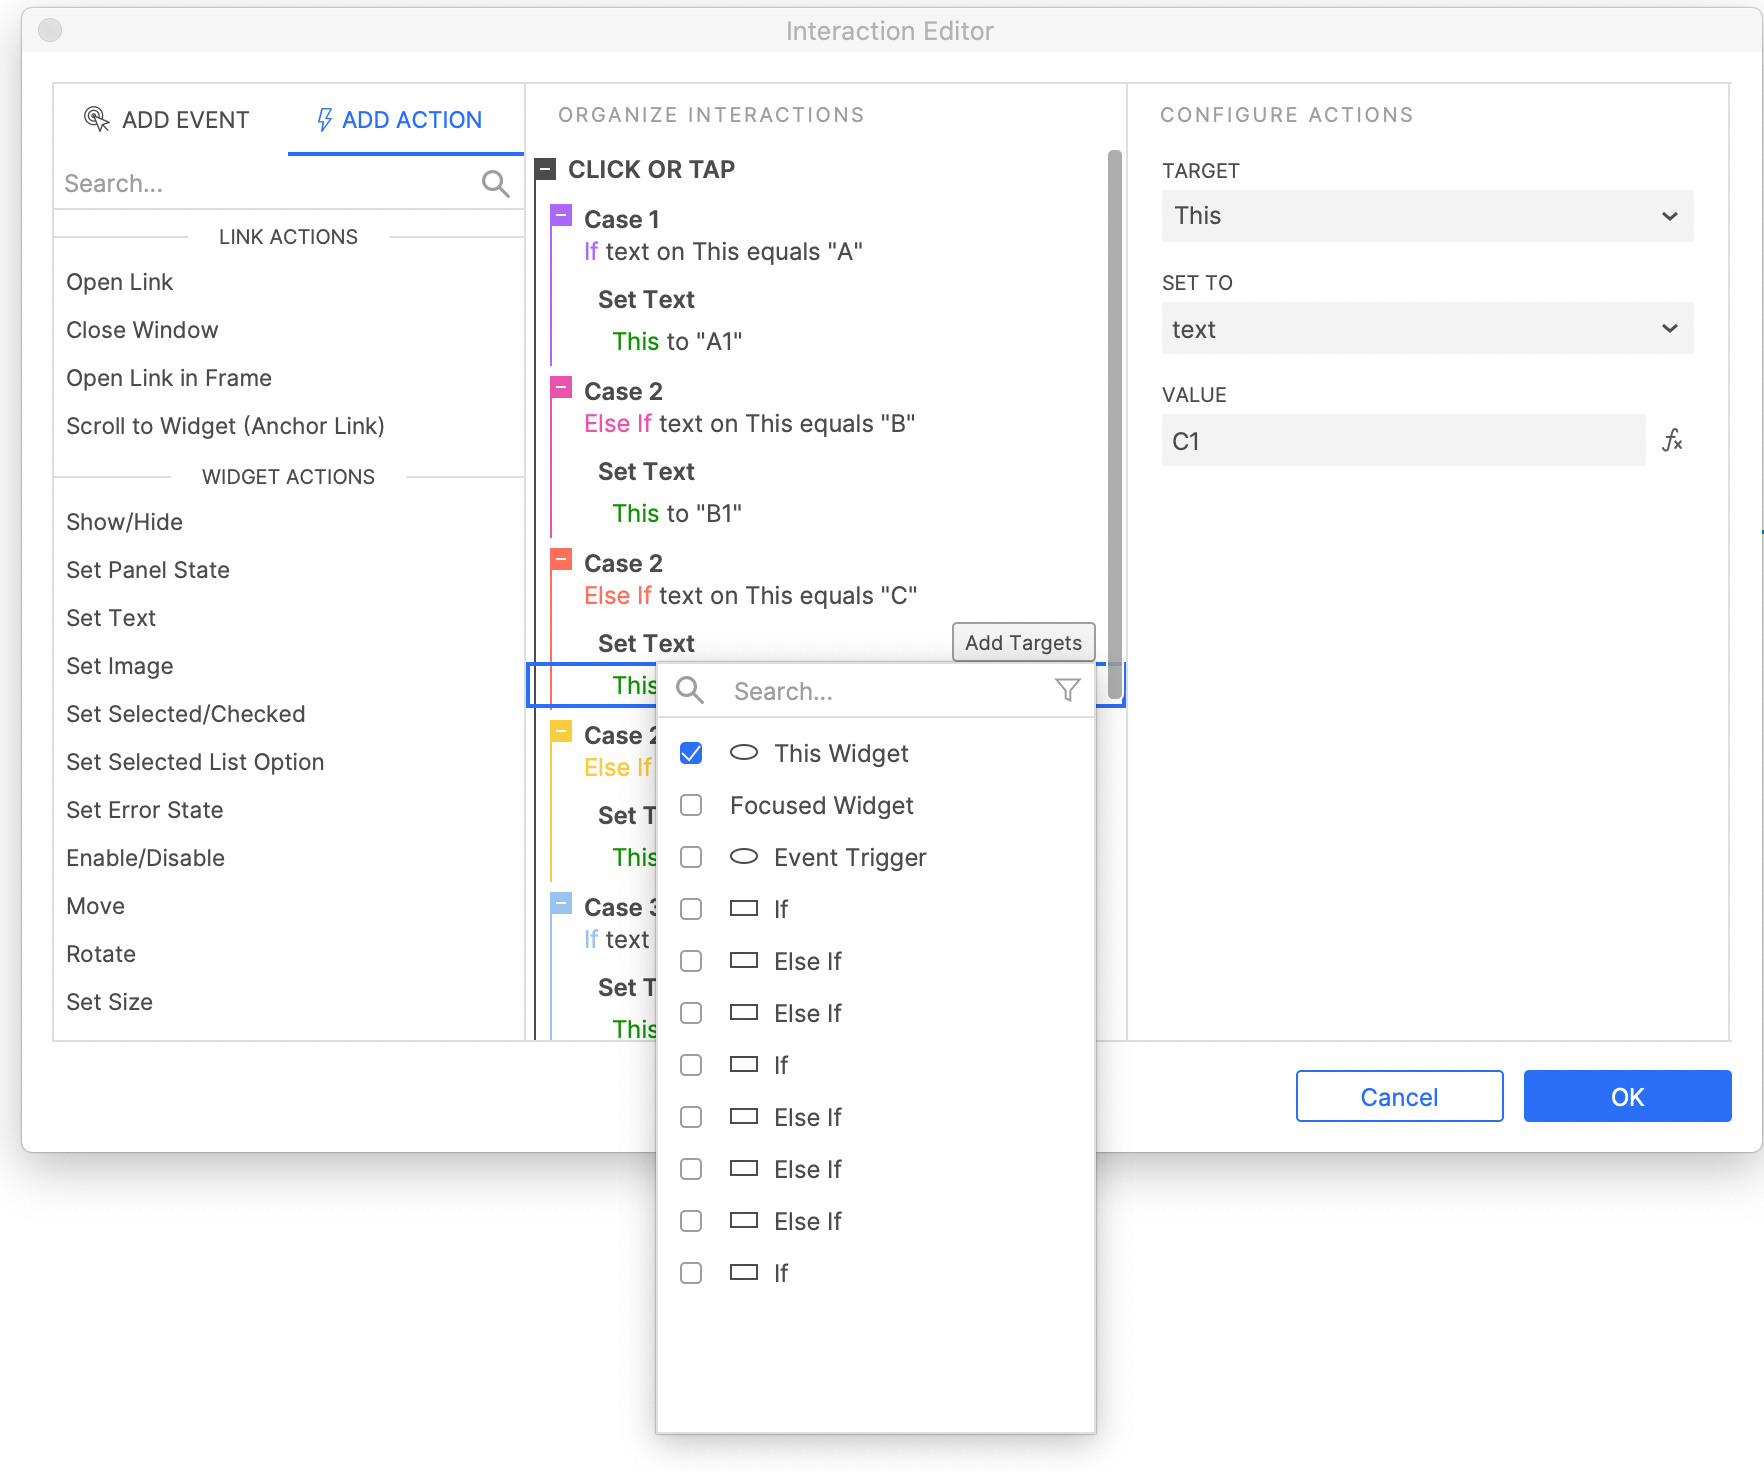
You can also double-click the action, and the Interaction Editor will pop up, where you can add, delete, modify, and search for actions.

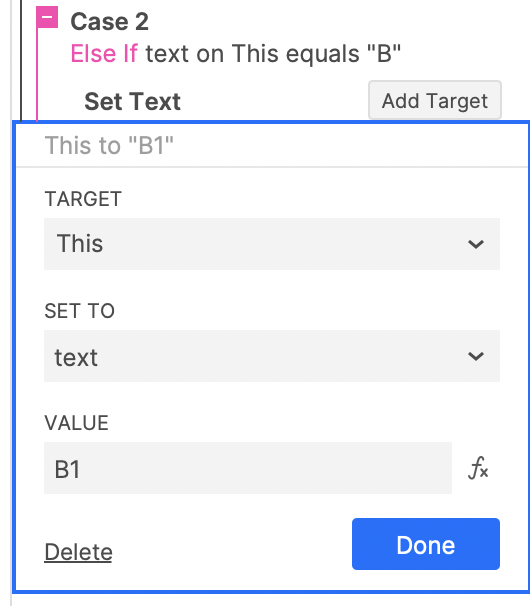
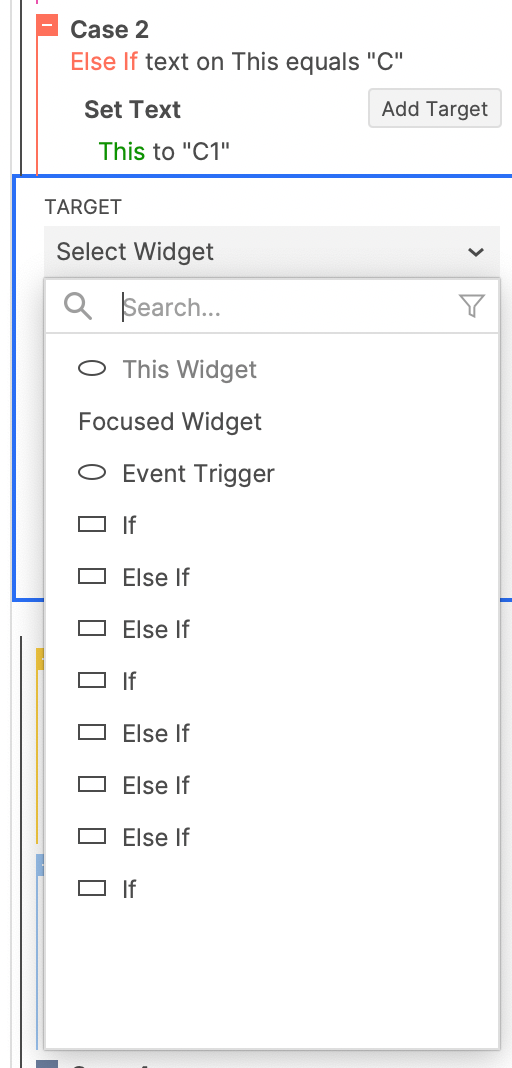
Add Target
You can add Targets to the action, there are 2 ways, one is to click the Add Target button directly on the interactions pane.
The disadvantage of this approach is that only one Target can be added at a time.
Another way is to select the action on the Interaction Editor and click the Add Targets button.
The advantage of this approach is that you can add multiple Targets at once.
Reference resources
For a detailed introduction and template of all Actions, you can view the article Axure Tutorial: Actions Full Guide - Axure Interactive Template.
Add Style Effect
Style Effect is a style setting that changes the widget style during interaction with widgets.

Click the + Add Style Effect button, you can select the interaction style in the drop-down list.


Set widget interaction style on the Interactions pane.
Preview the Prototype

On the generated prototype, you can see the set interaction style.
Other Interactions

Tooltip
After filling in the Tooltip, when the mouse hovers over the widget, the Tooltip will be displayed.
Selection Group
It is mainly used to set that only one widget in a group will be selected. For example, the switching of tabs. When the content is filled in, the widget will be assigned to the selection group.
Reference Page
Used to add page links to widgets. Click reference page button and select pages, and the text of the widget will change to the page name.
That's all for today's lesson. Next lesson we will introduce how to add notes to widget.
If you have any questions and suggestions, please leave a message.
If you like the article, please share it with others with page link, thanks for your supporting! ❤
Well Joe @AxureBoutique, a technical writer and teacher, focuses on Axure prototype design and product design.


Leave a comment