

Axure Tips: Use Guides to Create Grid Layout
Introduction
This article is a part of course Axure Full Course: Tutorial, Tips and Templates.
In a designer's toolbox, grids are considered to be one of the basic common tool. Grids can quickly help you organize your web or app layout in short time. Almost all design systems have their grid specifications.
With Guides in Axure, we can quickly create grids.
Next, we will use the grid widget in the MUI widget library to illustrate how to create a grid layout through guides
Use Grid Widget
First, load the MUI widget library, search for Grid, and drag the Grid widget into the canvas.
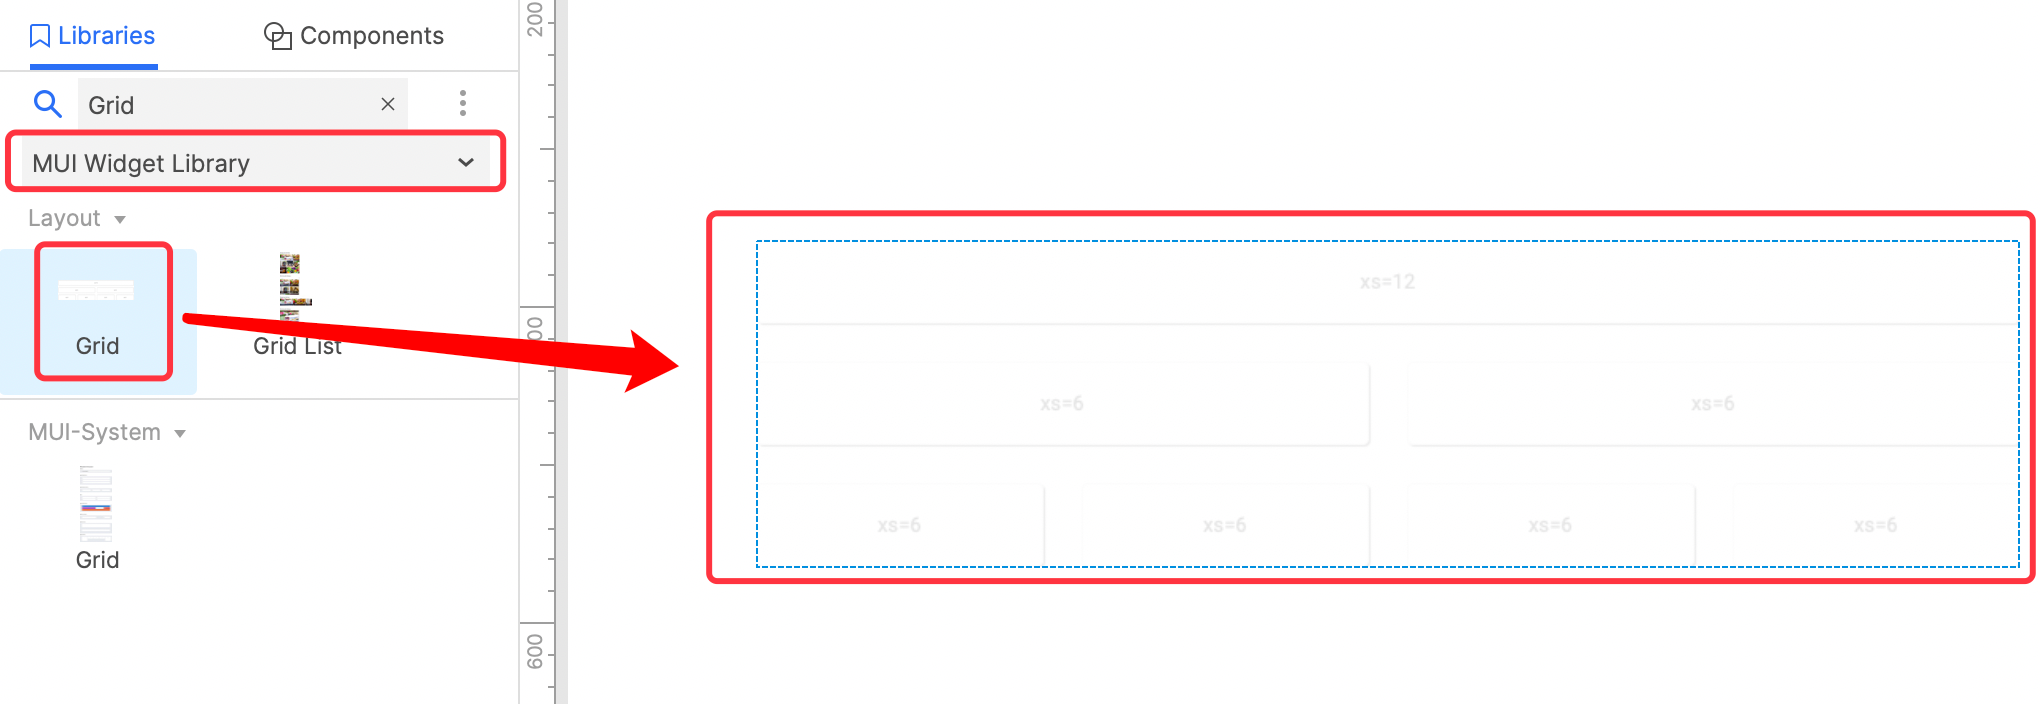
Drag Grid Widget into Canvas
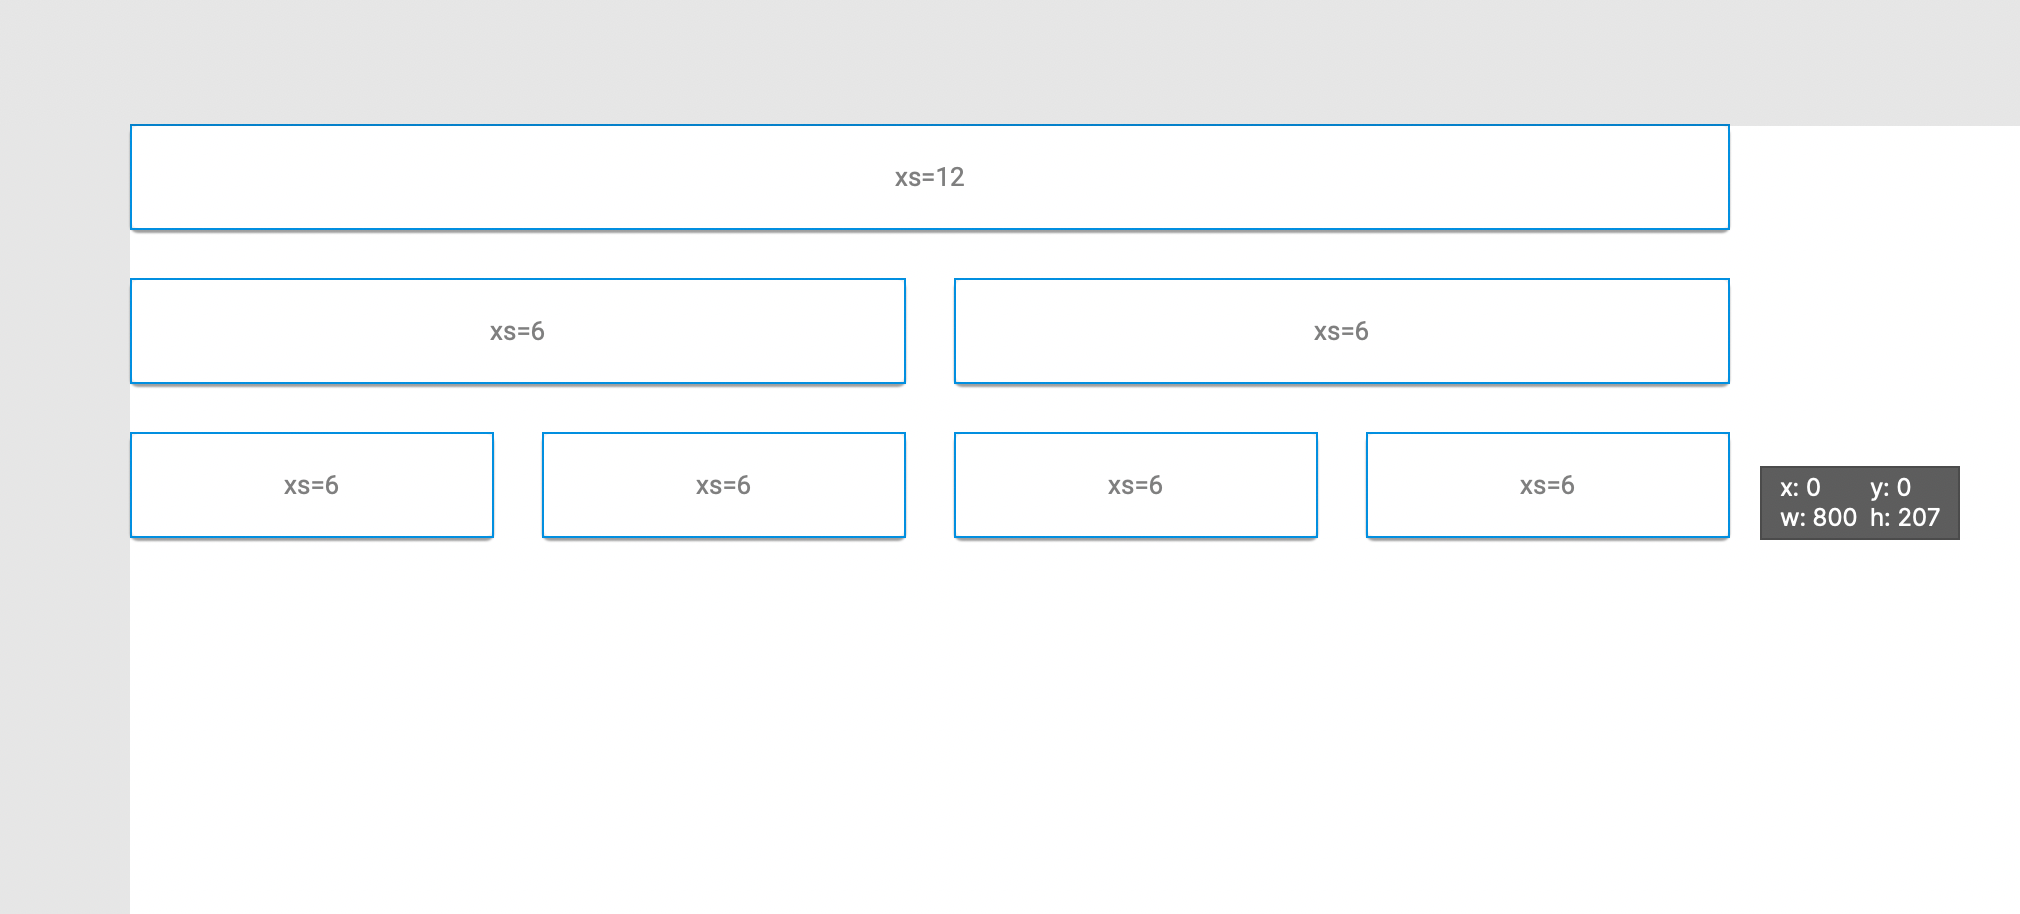
Move Grid Widget to (0,0)
Move Grid to the top left corner of the canvas.
Add Guides to Canvas
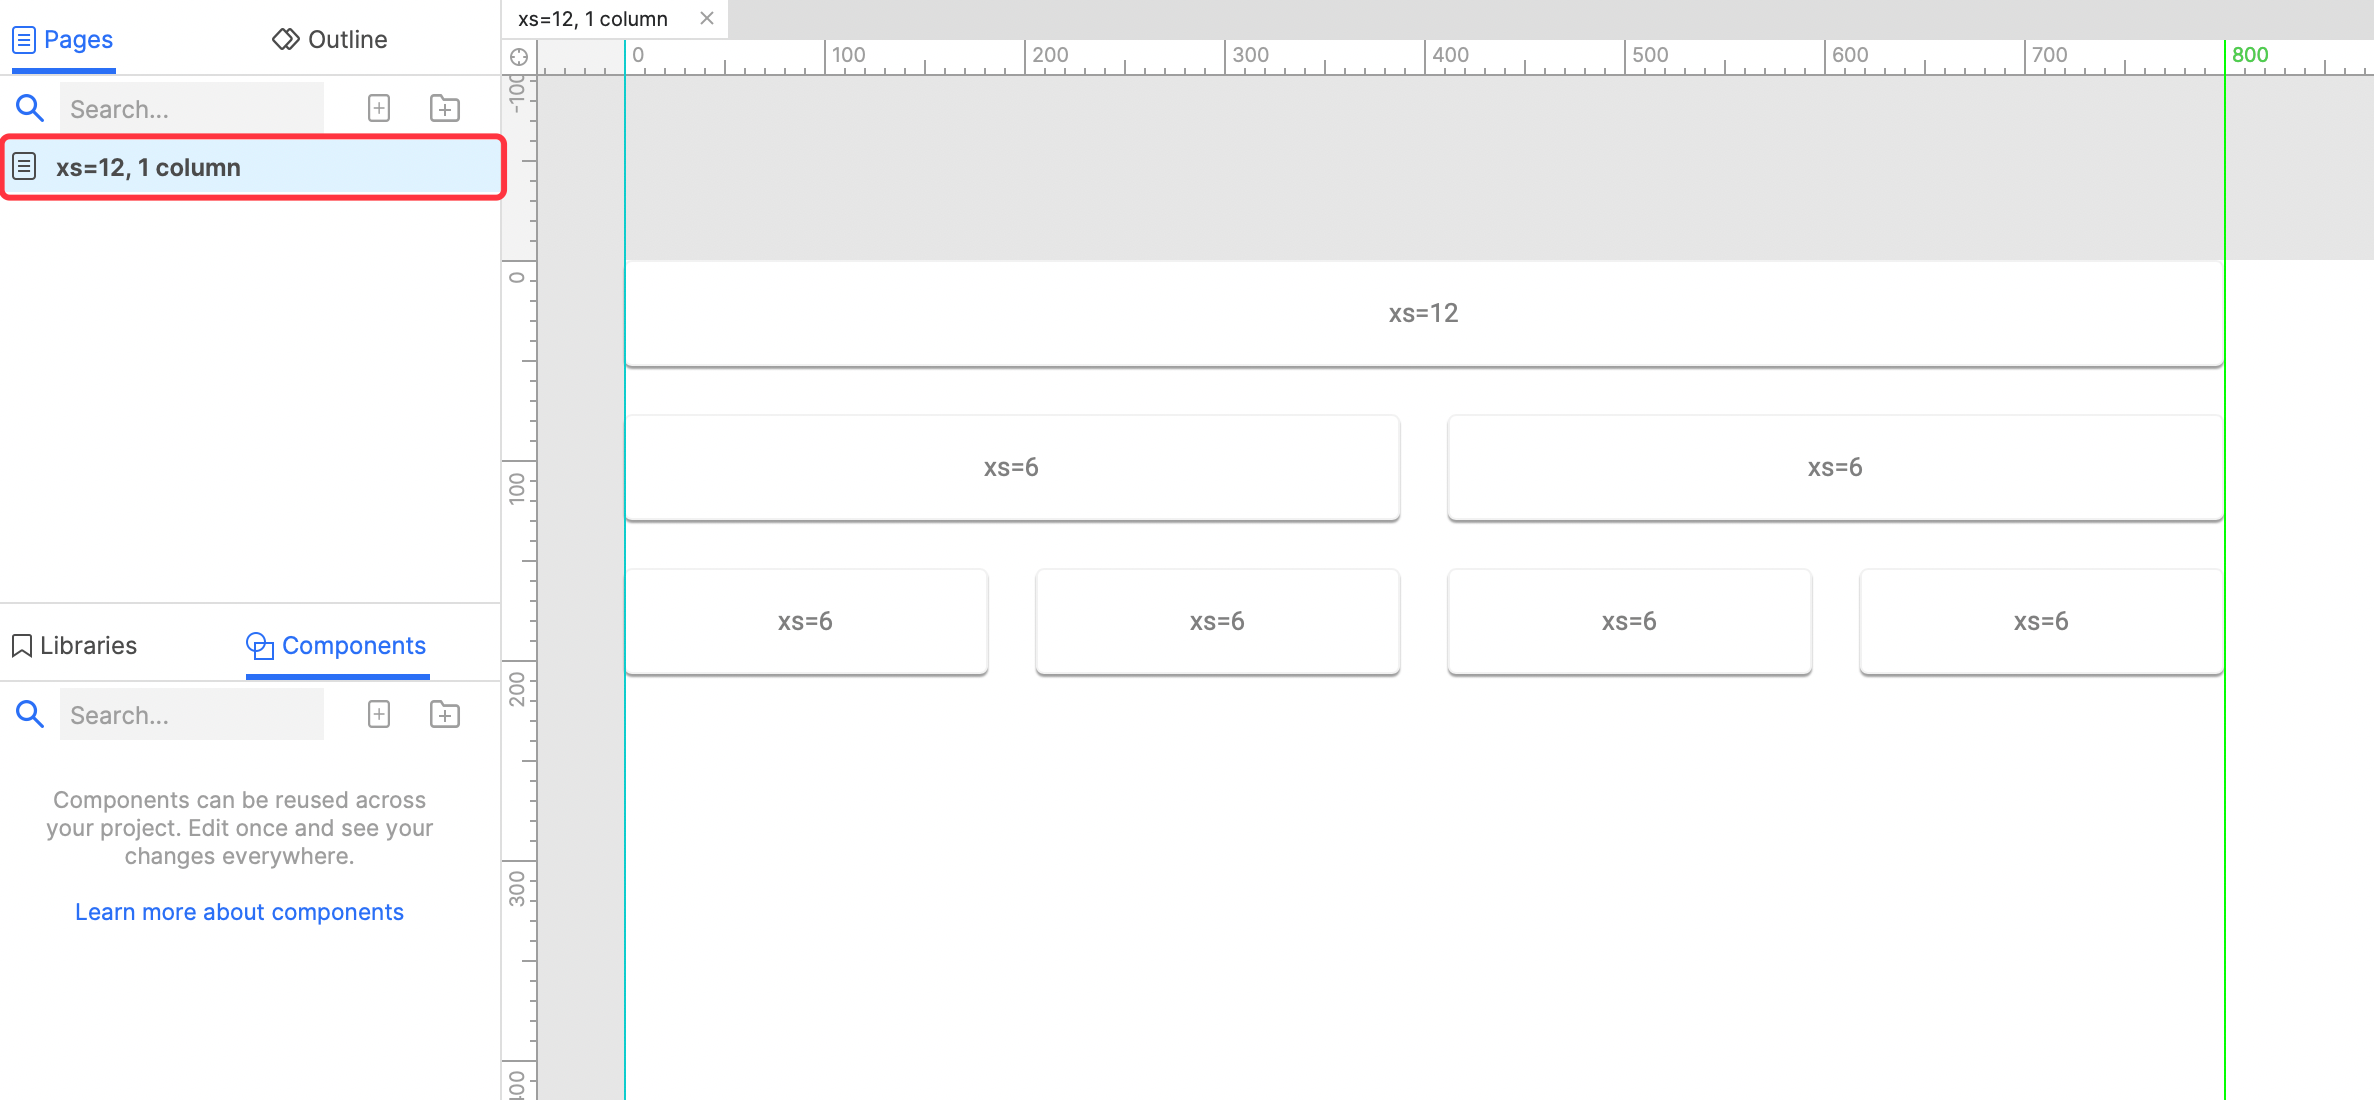
1. Drag the Guides into the canvas, align with the xs=12 widget in the first row, and name the first page xs=12, 1column.
2. Drag the Guides into the canvas, align with the xs=6 widgets in the second row, and name the second page xs=6, 2columns.

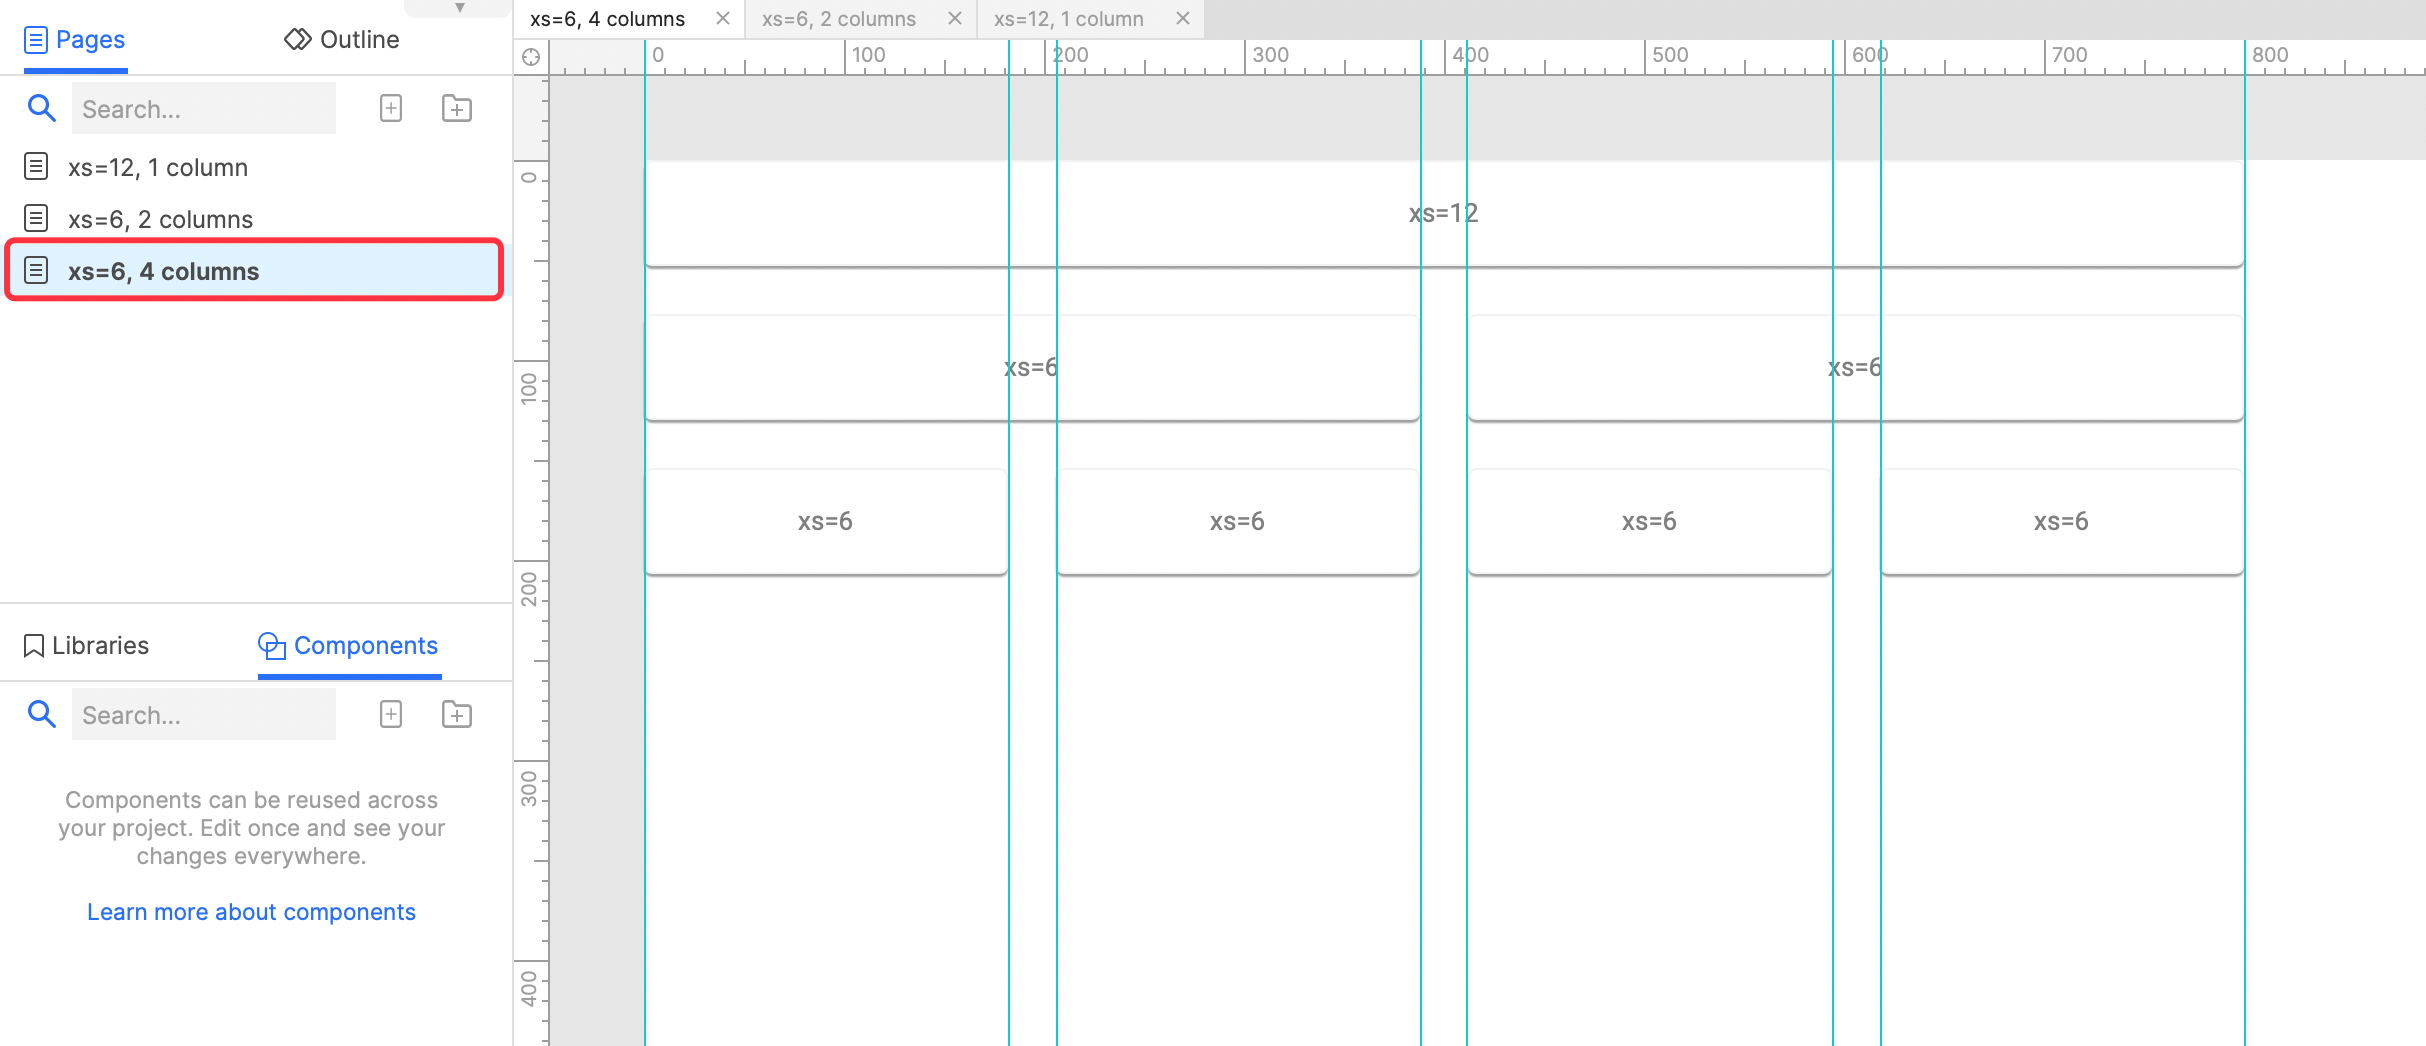
3. Drag the Guides into the canvas, align with the xs=6 widgets in the third row, and name the third page xs=6, 4columns.
Finally, lock all Guides to prevent accidental deletion or removal.
In this way, the basic page grid layout design is completed. When you use it next time, you can copy the corresponding pages and design quickly.
That's all for today's lesson. If you have any questions and suggestions, please leave a message.
If you like the article, please share it with others with page link, thanks for your supporting!
Note: Click here to download the completed RP file for this tutorial (RP 10 or up).
Well Joe @AxureBoutique, a technology writer and teacher, focuses on Axure prototype design and product design.


Leave a comment